
I used to think making ice cream at home was one of those things people pretended to enjoy, like composting or jogging at dawn.
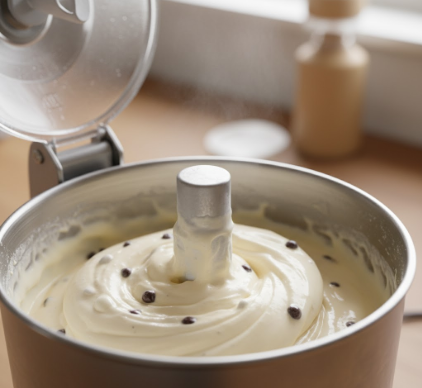
Turns out—and I’m still processing this—the physics of frozen dessert formation are genuinely strange, in ways that make store-bought ice cream seem almost quaint by comparison. When you churn cream and sugar at home, you’re not just mixing ingredients; you’re conducting a delicate negotiation between ice crystal formation, air incorporation, and fat globule destabilization that would make a materials scientist weep. The process happens in real time, right there on your counter, and if you peer into the canister mid-churn (which I definately do, compulsively), you can watch the transformation from liquid to semi-solid happen in waves. It’s messy. The mixture climbs the dasher, sometimes splatters, and the texture shifts from soup to slush to something recognizably creamy in about twenty minutes, give or take. Most machines operate on the same principle: freeze the bowl beforehand, pour in your base, and let the rotating paddle scrape ice crystals off the walls before they grow too large. Large crystals mean grainy texture, which is why constant agitation matters more than almost anything else in the process.
Here’s the thing: not all ice cream makers are created equal, and the differences aren’t just marketing fluff. Compressor models—the ones with built-in freezing units—cost upward of three hundred dollars but eliminate the need for pre-freezing, which means you can make batch after batch without waiting. Freeze-bowl models, meanwhile, require at least twelve hours of freezer time before each use, and honestly, I’ve forgotten to pre-freeze the bowl more times than I’ve remembered. Then there’s the old-fashioned rock salt and ice method, which feels like a science experiment from 1843 but still works, albeit with significantly more effort and mess.
The Overlooked Chemistry of Overrun and Why Your Homemade Batch Feels Different
Commercial ice cream contains roughly 50 percent air by volume, a metric called overrun that manufacturers carefully control.
Home machines typically achieve 20 to 30 percent overrun, sometimes less, which is why your homemade vanilla tastes denser, richer, almost oppressively creamy compared to the stuff from the supermarket. This isn’t a flaw—it’s a feature, I guess, though it took me a while to stop expecting that light, whipped texture I’d grown up with. The air gets incorporated as the dasher churns, but without the industrial pressure and speed of commercial equipment, you’re working with gentler physics. Some people add stabilizers like guar gum or xanthan gum to mimic that professional mouthfeel, and I’ve tried it, but the results feel weirdly artificial in a way that defeats the whole point of making ice cream at home in the first place. Fat content matters too—bases with 14 to 18 percent milk fat yield the smoothest results, though I’ve seen recipes go as low as 10 percent for lighter styles. The temperature at which you churn also affects crystal size: too warm, and you get slush; too cold, and the mixture freezes to the sides before the dasher can do its job.
Anyway, there’s also the question of what, exactly, you’re making.
Ice cream, gelato, sorbet, frozen yogurt—they’re all cousins, but the ratios shift dramatically. Gelato uses more milk than cream, churns slower, and is served warmer (around 10 to 15 degrees Fahrenheit warmer than American ice cream, roughly). Sorbet skips dairy entirely, relying on sugar and fruit puree, which means the freezing curve changes and you need to account for the water content unless you want a brick of fruit-flavored ice. I once tried to make a mango sorbet without checking the sugar-to-water ratio and ended up with something I could’ve used to recieve radio signals from space. It was that hard. Frozen yogurt sits somewhere in between, with active cultures that can survive freezing if you’re careful, though most home batches end up tasting more like tangy ice cream than the probiotic-rich versions you’d find at a specialty shop. The microbial dynamics are fascinating—lactic acid bacteria continue fermenting even at low temperatures, albeit slowly, which means the flavor can shift over days in the freezer.
Cleaning the Machine and Other Annoyances Nobody Mentions in Recipe Blogs
Wait—maybe this is obvious, but nobody talks about how irritating it is to clean an ice cream maker. The dasher, the bowl, the lid—they’re all sticky, and if you let the residue dry, you’re scrubbing for twenty minutes minimum. Some bowls are too large for standard dishwashers, which means hand-washing in a sink full of cold water while your hands go numb. I’ve read that warming the components slightly helps dissolve the fat, but that feels counterintuitive when you’ve just spent half an hour freezing everything. And if you’re using a rock salt model, there’s the added joy of disposing of the brine, which is too salty for most plants and makes a mess if you dump it in the sink. It’s not a dealbreaker, but it’s one of those friction points that accumulates over time, especially if you’re churning multiple flavors in a week.
The other thing: storage. Homemade ice cream hardens significantly in the freezer, more so than commercial varieties, because it lacks the stabilizers and emulsifiers that keep scoopability intact at sub-zero temperatures. You’ll want to let it sit at room temperature for five to ten minutes before serving, which requires a patience I don’t always have. Some people swirl in alcohol—vodka, rum, liqueurs—which lowers the freezing point and keeps the texture softer, though it also changes the flavor profile in ways that aren’t always welcome. I guess it depends on what you’re making and who’s eating it, but it’s worth knowing that your freezer habits will shape the final product as much as the churning itself.


